CapCut 4K Export Guide 2026: The Exact Settings That Keep Your Videos Crystal Clear
You spent an hour editing the perfect video. The transitions are smooth. The colors pop. The music hits just right. Then you export it and it comes out looking soft, grainy, and completely washed out. Sound familiar? You’re not alone. This is one of the most frustrating things creators face in 2026, and the fix is simpler than you think. The problem isn’t your footage. It’s your CapCut 4K export settings.
This guide tell you through every setting you need to export sharp, professional-quality videos from CapCut on both mobile and desktop for every major platform.
Why Export Settings Matter More Than You Think
Most creators focus 100% on editing and treat export as an afterthought. That’s a mistake.
Even flawless footage can come out blurry or pixelated if your bitrate is too low. Even a cinematic color grade can look flat if you’re using the wrong codec. Export settings are the final filter between your work and your audience and getting them wrong means all your effort goes to waste.
The good news? Once you understand a few core settings, you’ll never second-guess your export again.
Also check : Latest capcut Templates
Understanding CapCut Export Settings: The Basics
Before jumping into the step-by-step, let’s break down what each setting actually does.
Resolution
Resolution determines how much detail your video contains.
| Resolution | Best For |
|---|---|
| 720p | Quick previews, internal use |
| 1080p | Most social media platforms |
| 2K | Higher detail, smaller files than 4K |
| 4K (2160p) | YouTube, ads, client work, cinematic |
| 8K | Professional film not needed for social |
For most creators in 2026, 4K is the sweet spot for YouTube and professional deliverables. For TikTok and Reels, 1080p is typically the platform limit anyway though exporting in 4K gives platforms more detail to compress from.
Frame Rate (fps)
Frame rate controls how smooth your video looks in motion.
- 24 fps — cinematic, film-like feel
- 30 fps — standard for most social content
- 60 fps — smooth motion, great for action or sports
One important rule: always match your export fps to your footage. Exporting at 60fps when you filmed at 30fps doesn’t add smoothness it just inflates your file size.
Bitrate
Bitrate controls how much data is used per second of video. Higher bitrate = more detail retained.
- Low bitrate: smaller file, more compression, visible quality loss
- High bitrate: larger file, less compression, maximum sharpness
For 4K exports, aim for 35–68 Mbps as a target range.
Codec
The codec determines how your video is compressed and decoded.
- H.264 universally compatible, works everywhere, slightly larger files
- HEVC (H.265) same quality at roughly half the file size, but requires more processing power to decode
For social uploads, H.264 is the safest choice. For client deliverables or archiving, HEVC is more efficient.
How to Export in 4K on CapCut Mobile (Step-by-Step)
CapCut mobile makes 4K export straightforward but the settings are easy to miss if you’ve never looked.
- Step 1: Finish Your Edit Make sure all transitions, color corrections, captions, and audio are finalized before touching the export button.
- Step 2: Tap the Export Button You’ll find it in the top-right corner of your editing timeline. It looks like an upward arrow.
- Step 3: Adjust Your Settings A panel will appear with the following options:
- Resolution → Select 4K (2160p)
- Frame Rate → Choose 30fps for standard content or 60fps for motion-heavy footage
- Bitrate → Drag the slider to High for maximum quality
- Codec → Choose H.264 for social platforms or HEVC if you’re archiving
- Step 4: Tap Export CapCut will render and save the video to your camera roll. Export time depends on your device, video length, and effects applied.
Pro Tip: Close all background apps before exporting. This frees up RAM and can speed up rendering significantly on older phones.
How to Export in 4K on CapCut Desktop (Step-by-Step)
The desktop version gives you more granular control over your CapCut 4K export settings.
Step 1: Click the Export Button It’s in the top-right corner, just like the mobile app.
Step 2: Set Your Resolution
- Select 2160p (4K) from the resolution dropdown
Step 3: Choose Your Frame Rate
- Match it to your original footage (30fps or 60fps)
Step 4: Set Bitrate to Custom
- For 4K at 30fps: set to 35–50 Mbps
- For 4K at 60fps: set to 50–68 Mbps
- This is higher quality than the “High” preset on desktop
Step 5: Select Your Codec
- H.264 for YouTube, TikTok, and Reels
- HEVC for client delivery or offline storage
Step 6: Choose File Format
- MP4 for social media (most compatible)
- MOV for professional/client delivery
Step 7: Click Export Desktop rendering is generally faster than mobile, especially for 4K files.
Best CapCut 4K Export Settings by Platform
Not every platform handles 4K the same way. Here’s what works best for each.
YouTube
YouTube is where 4K truly shines. The platform actively processes 4K uploads at higher bitrates, which means your video quality stays sharper even after compression.
- Resolution: 4K (2160p)
- Frame Rate: 30fps or 60fps
- Bitrate: 50–68 Mbps
- Codec: H.264 or HEVC
- Format: MP4
TikTok
TikTok compresses uploads aggressively. Even if you export in 4K, TikTok will re-encode your video to their own specs. But exporting higher quality gives the platform more to work with.
- Resolution: 1080p or 4K
- Frame Rate: 30fps
- Bitrate: High
- Codec: H.264
- Format: MP4
- Aspect Ratio: 9:16 vertical
Instagram Reels
Similar to TikTok, Reels compresses on upload. Still, starting with higher quality always produces a better final result.
- Resolution: 1080p (Reels doesn’t go beyond 1080p currently)
- Frame Rate: 30fps
- Bitrate: High
- Codec: H.264
- Format: MP4
Client / Professional Delivery
For files going to clients or agencies, don’t compress. Give them maximum quality.
- Resolution: 4K (2160p)
- Frame Rate: Match source footage
- Bitrate: 60–100 Mbps
- Codec: HEVC (H.265)
- Format: MOV or MP4
CapCut Free vs Pro: What’s the Difference for 4K Export?
A lot of creators wonder if the free version is enough. Here’s the honest breakdown.
| Feature | CapCut Free | CapCut Pro |
|---|---|---|
| 4K Export | ✅ Yes | ✅ Yes |
| Watermark | ❌ Watermark added | ✅ No watermark |
| HEVC Codec | ❌ Not available | ✅ Available |
| Smart HDR | ❌ No | ✅ Yes |
| AI Enhancements | Limited | ✅ Full access |
| Export Limit | Limited per day | ✅ Unlimited |
The bottom line: Free users can absolutely export in 4K. The main reason to upgrade to Pro is the watermark removal, HEVC codec access, and AI-powered quality tools.
Common CapCut Export Problems (And How to Fix Them)
Even with the right settings, things can go wrong. Here’s how to troubleshoot the most common issues.
Problem: Video looks blurry after export
- Solution: Increase your bitrate. For 4K, set it to at least 35 Mbps. Low bitrate is the #1 cause of soft-looking exports.
Problem: 4K option is grayed out on mobile
- Solution: Your device may not have enough processing power or storage. Free up space, close background apps, and update CapCut. Older phones sometimes need to export at 1080p first.
Problem: File size is enormous
- Solution: Switch from H.264 to HEVC (H.265). You’ll get the same quality at roughly half the file size.
Problem: Video looks great in CapCut but blurry on social media
- Solution: This is platform compression, not an export error. Export at the highest quality possible so the platform has more data to compress from.
Problem: Export is extremely slow
- Solution: Close all other apps, plug in your charger, and keep your device cool. Thermal throttling is a real issue during long renders.
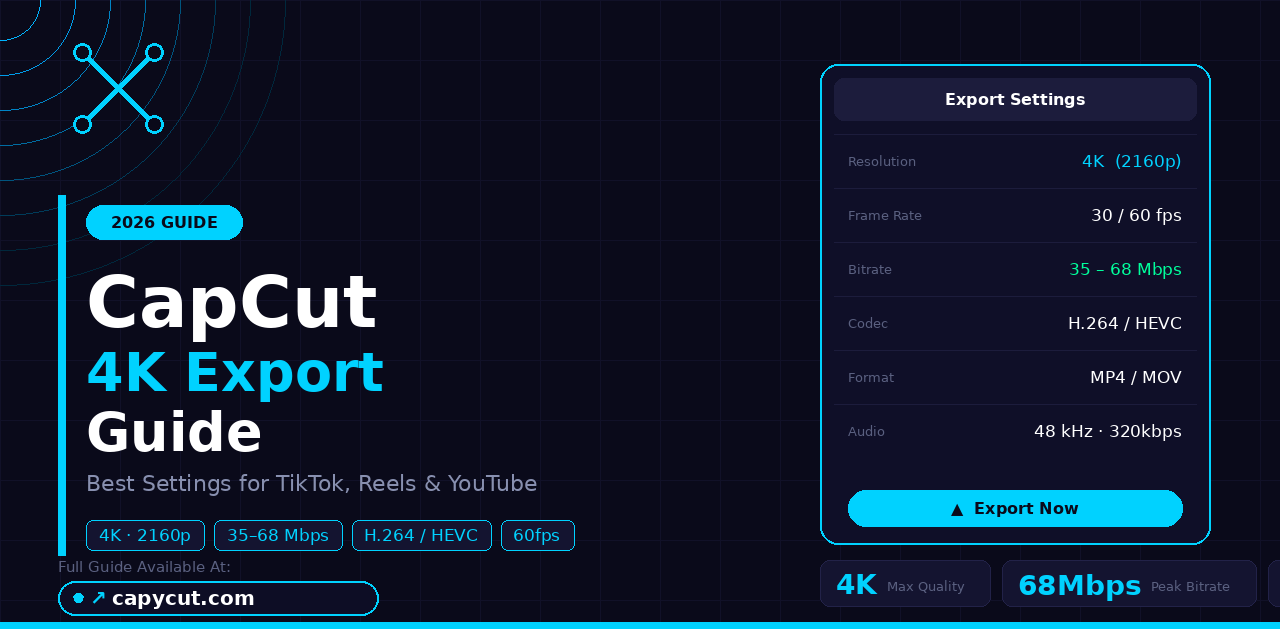
Quick-Reference: Best CapCut 4K Export Settings (2026)
| Setting | Recommended Value |
|---|---|
| Resolution | 4K (2160p) |
| Frame Rate | 30fps (or match source) |
| Bitrate | 35–68 Mbps |
| Codec | H.264 (social) / HEVC (archive) |
| Format | MP4 |
| Audio | 48 kHz, 320 kbps |
Save this table. It covers 90% of what you’ll ever need for CapCut 4K export.
Conclusion:
Knowing how to use CapCut 4K export settings in 2026 is one of the most underrated skills a creator can have. You can have the best edit in the world but if you export it wrong, nobody sees it at its best.
The key takeaways:
- Match your export settings to your destination platform
- Always use high bitrate for 4K exports
- Use H.264 for social, HEVC for client work
- Don’t export in 4K if your original footage isn’t 4K it won’t improve quality
FAQ:
Can I export 4K videos in CapCut for free?
Yes. CapCut’s free version supports 4K export on both mobile and desktop. The main limitation is that free exports include a watermark. Upgrade to CapCut Pro to remove it.
What is the best bitrate for CapCut 4K export?
For 4K at 30fps, use 35–50 Mbps. For 4K at 60fps, target 50–68 Mbps. These settings retain maximum detail without creating unnecessarily huge files.
Should I use H.264 or HEVC for CapCut 4K export?
Use H.264 if you’re uploading to social media it’s more widely compatible. Choose HEVC if you’re archiving files or delivering to clients, as it offers the same quality at roughly half the file size.
Why does my CapCut 4K video look blurry after uploading to TikTok?
TikTok compresses all uploaded videos regardless of your export quality. To minimize quality loss, always export at the highest resolution and bitrate possible before uploading. This gives TikTok more data to work from during compression.
Does exporting in 4K make a 1080p clip look better?
No. Upscaling a 1080p clip to 4K doesn’t add real detail it just creates a larger file. Export in the resolution your footage was actually recorded in for the best results.
How long does CapCut 4K export take?
it depends on video length, effects, and device power. A 60-second clip with moderate effects can take 1–3 minutes on a mid-range phone. On desktop, the same clip typically renders in under a minute. Closing background apps and charging your device speeds things up significantly.